The Excessive Absence Report generates a detailed listing of absences for a class, based on a date range and a threshold value entered by the user, where absences within the date range that are in excess of the threshold value will be reported as excessive. Letters and emails to parent/guardians may also be created and printed for those students listed on the report.
While details specific to this report will follow, users can find general information about reports within the Reports documentation.
Excessive Absence Report is located within Reports in the Attendance menu in Q.
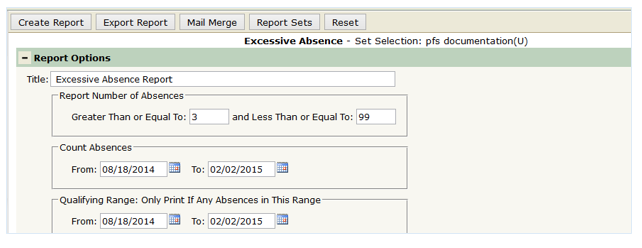
This report looks at class attendance records on a per-class basis and reports students who have greater than or equal to the minimum amount of absences entered in the first field, and less than or equal to the maximum amount of absences entered in the second field - during the date range defined in the Count Absences field. The attendance codes queried do not have to strictly be absence codes. Users can choose a specific attendance code or multiple attendance codes to query, such as tardies, excused absences, doctor visits, suspension days, etc.
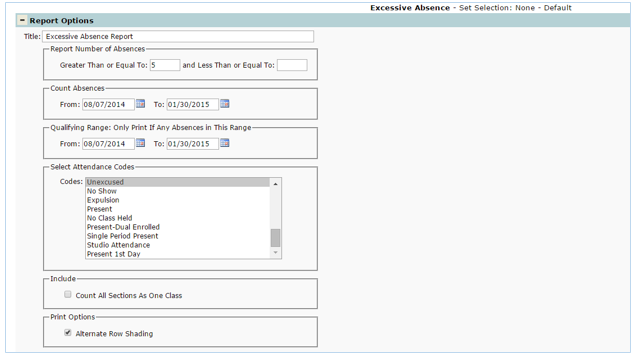
- Title – the report title defaults to Excessive Absence Report, but can be edited and a user-defined title can be entered.
- Report Number of Absences – the minimum number entered here is the most important because it sets the threshold that defines what it considered to be excessive absence for a class. The second field here could be left blank if the counting is open-ended, or a value could be entered to set a maximum amount of absences.
- Count Absences – define a date range for counting absences.
- Qualifying Range—Only Print If Any Absences in This Range – The Qualifying date range is typically used to check for attendance for the period after the last Excessive Absence notification was received so that the parent is not notified about those same classes again unless additional absences were incurred in those classes during the Qualifying date range.
- Select Attendance Codes – A single attendance code can be counted when calculating this report, as well as a set of codes in combination by holding the CTRL key while selecting different codes.
- Include—Count All Sections As One Class – this option is used in case of schedule adjustments, if students are moved to another section of the same course, checking this option will cause the report to total the combined absences from both sections as if they were from one class.
- Print Options—Alternate Row Shading – this option is defaulted ON, but if users do not want shading on the report, it can be turned OFF by unchecking this box.
The Mail Merge Button on the Excessive Absence report is where the merge documents are created and stored. Documents may be created in different languages and formatted to send as letters or emails.

To create a new document:
- Click Mail Merge button.
- Select Add New from the Document drop down list.
- When the New Document pop up box opens, add a document title.
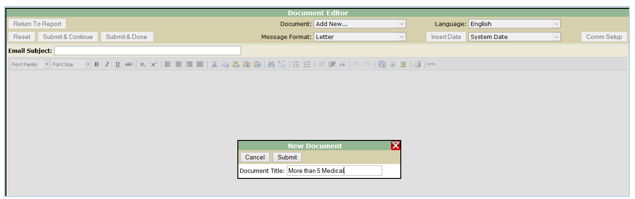
- Click Submit, which opens the Document Editor.
- Select Message Format; Letter or Email.
- Select Language (the default is English but other languages are available in the Language drop down list).
- Select Font Family and Font Size.
- Select Communications Setup options (these options are dependent on communications tracking being set up in Front Office).
- Set communication type.
- Sender Participation type.
- Recipient participation type.

- Once all the selections have been made, you’re ready to add the letter/email content.
- Available merge fields are displayed in the drop down list next to Insert Data.
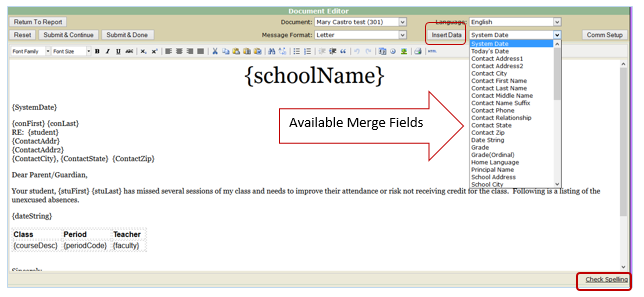
- Type your letter adding merge fields where desired.
- Merge fields are added by selecting the merge field from the list, positioning your curser where you would like the field to appear in the letter, and clicking Insert Data.
- Spell check is available when creating letters.
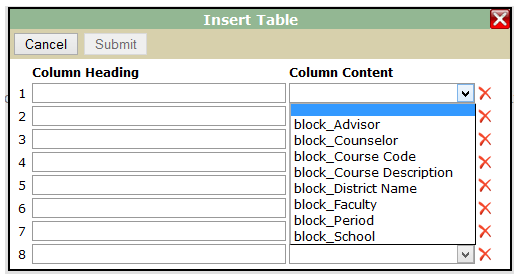
- Repeating Table – A listing of a student’s attendance events is easy to add to the letter using a repeating table. To add a repeating table:
- Select Repeating Table from the merge fields drop down list.
- Enter desired Column Headings.
- Select corresponding column content from drop down choices.

- Repeating Block – The student’s attendance events can also be listed in a repeating block. The repeating block will display the student’s data in chunks up and down the page.
- Select Repeating Block from drop down list.
Additional merge fields with the absence details must be enclosed between the begin and end tags. Whatever is inside the pair is repeated for each instance of the detail. Normal text, tabs, and carriage returns can be added inside the block to create labels, blank lines, spacing, headers, etc.

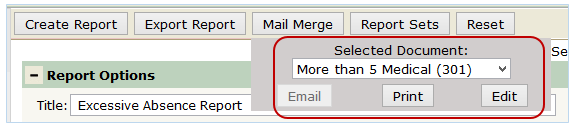
- Existing letters may be edited by clicking the Mail Merge button to open the document list.
- Selected the desired document from the list and click Edit to open the document editor. Make any desired changes and Submit.
There are four possible ways to run the report:
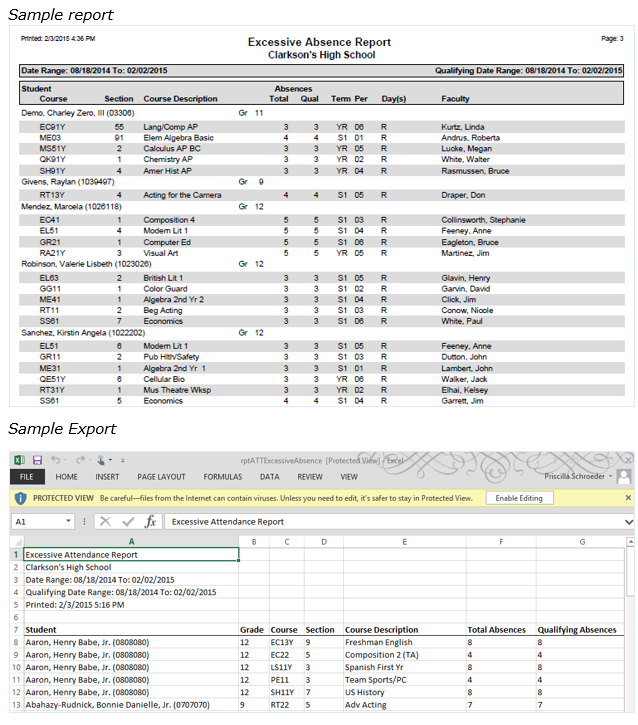
- Create Report for a report listing students who meet the criteria entered in the Report Options.
- Export Report to an Excel spreadsheet.
- Mail Merge letters to students on the list.
- Mail Merge Emails to students on the list.
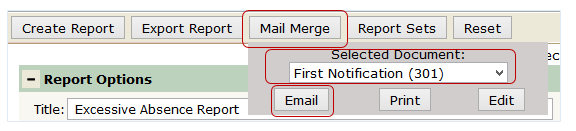
To print letters:
- Click the Mail Mergeoption
- Select letter from the Selected Documents list.
- Click on the Print button.
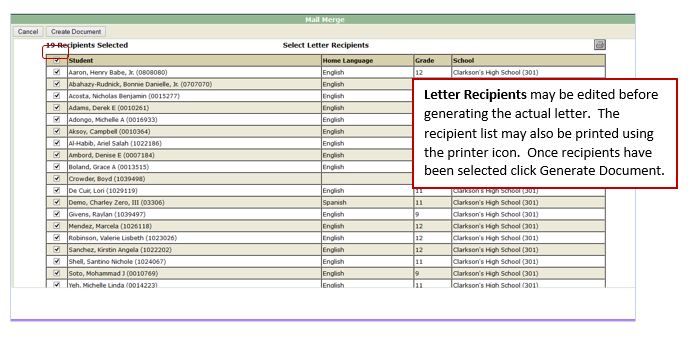
- The list of potential recipients displays. The default display listing has all students selected with the total number of students listed at the top of the list.
- The user may pick and choose who should receive the notification by removing the check from anyone who shouldn’t receive the notice.
- Clicking the top check mark in the header next to Student will remove all checks, making it easier to select just a couple of students if desired.
- This list may be printed for reference by clicking the printer icon.
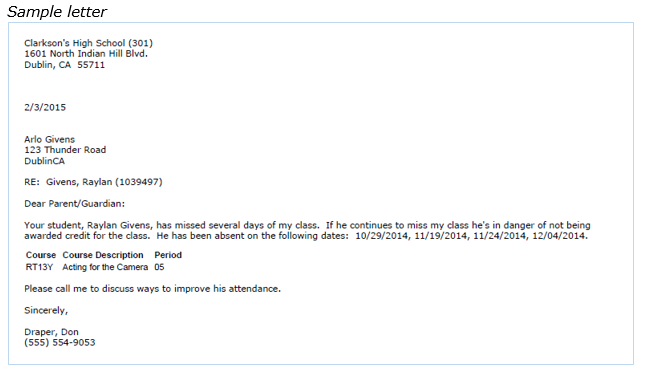
- If letters have been added in additional languages in the Message area, the letter will print in the student’s Home Language.
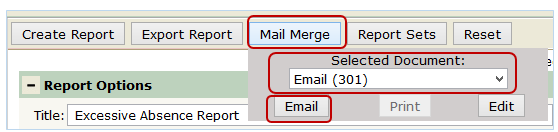
- Click the Mail Merge button.
- Select an email document from the Selected Documents list.
- Click on the Email option.
- The email recipient list will generate and gives the user a further chance to select or de-select the recipients.
- The email recipients include the student and the student’s primary contacts.
- An option is also available to CC to Self.
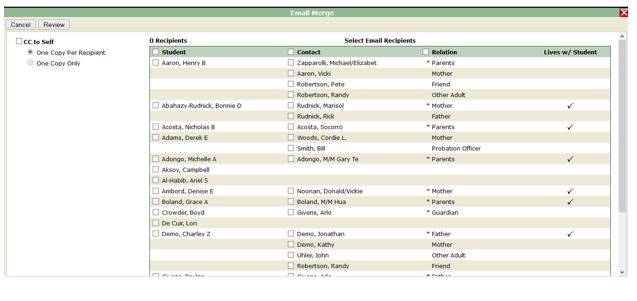
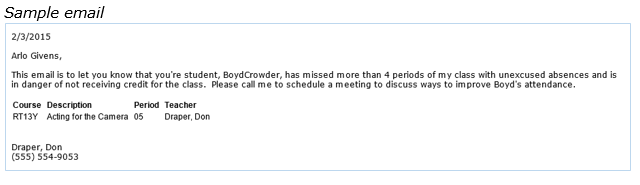
- When selections are complete, click Review. A final list of email recipients displays. The list may be printed using the printer icon.
- Click Send to send the emails.

| Permission Items | Description | Edit Checkbox |
|---|---|---|
| Q – Attendance Reports: Excessive Absence | Users who only have access to the Attendance Reports: Excessive Absence do not have access to the mail merge options and will not see the Mail Merge button. | |
| Q – Excessive Absence Mail Merge [Administrator] The user must also have permission for the Attendance Reports: Excessive Absence | Users with Administrator level access have full rights to all areas of the application: the user may run the report, create mail merge documents for print and email and print or email the preconfigured documents Note: User must have an email address on their staff record in order to send emails. | When unchecked, user is still able to do it all |
| Q – Excessive Absence Mail Merge [Application] The user must also have permission for the Attendance Reports: Excessive Absence | The Excessive Absence Mail Merge application allows the user to run the report and print the letter documents. They may NOT create or edit documents nor may they send email | Not applicable since there is no edit or adding ability with this permission set. |
| Q – Excessive Absence Mail Merge [Edit Document] The user must also have permission for the Attendance Reports: Excessive Absence | Can edit all mail merge documents Can send print letters Can’t send email Can’t create new letters | Users are able to edit documents whether or not the Edit Checkbox is on or off. |
| Q – Excessive Absence Mail Merge [Add Document] The user must also have permission for the Attendance Reports: Excessive Absence | Can add Letter by clicking Mail Merge and add New Can create an email document but can’t send email without email permission May not edit existing letters unless they also have Excessive Absence Mail Merge [Edit Document} | Users are able to add documents whether or not the Add Checkbox is on or off. |
| Q - Excessive Absence Mail Merge [Email Document] The user must also have permission for the Attendance Reports: Excessive Absence | Can run the report and print letters and send emails Can’t create new letters User must have a valid email address on their staff record |