Q Point-of-Sale Letters and Labels is used to create and maintain a variety of Food Service documents. Users can create Rosters, Mailing Labels, Bar codes, Account Statements, and Form Letters through the use of pre-built Reports and Mail Merge documents.
While details specific to this report will follow, users can find general information about reports within the Reports documentation.
Letters and Labels Report is located within Reports in the Food Service PoS menu in Q.
The Report Options allow the user to filter for the data needed by:
- Consumer (Student, Staff and Patron)
- Date
- Balance
- Eligibility
and generate letters and labels sorted and grouped by Report Output, Student, School, Class or Grade. All filters configured apply to the chosen Report Output and Mail Merge documents created.
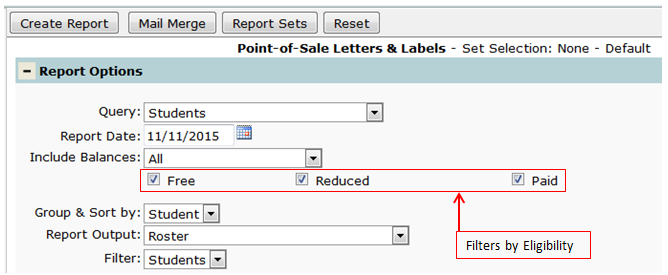
Shown below are the filters available through the use of the dropdown menus.
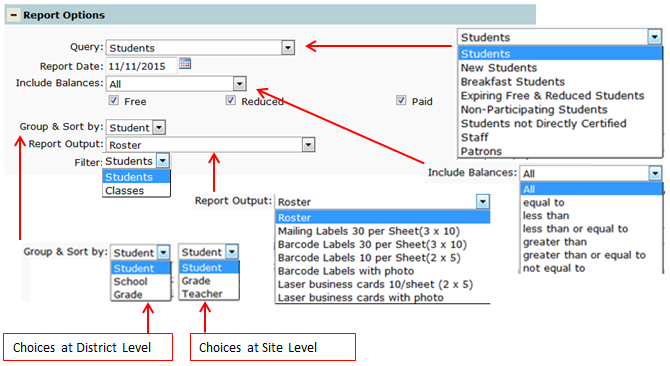
Using the Student/Classes filter changes the Selection choices and allows the user to filter based on either Class or Student data.
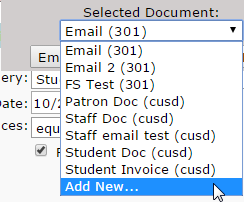
Click the Mail Merge button to show a drop down of all the created Mail Merge documents or choose to “Add New…” NOTE: The abilities to use Mail Merge, and to add, edit, and email Mail Merge documents are configured in the Permissions Editor.
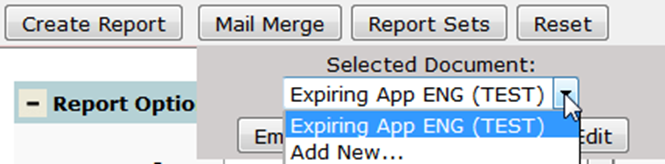
Each document created can be set up to either Print or Email. Each is a separate instance of the communication. If either Email or Print is greyed out, it means the document has not been set up for that function.

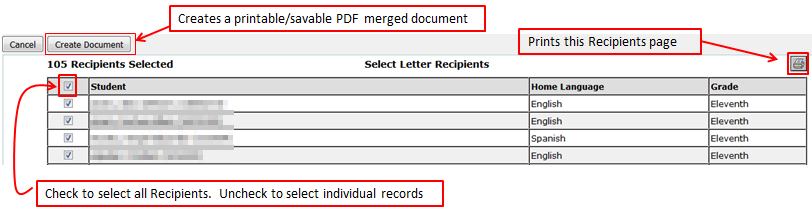
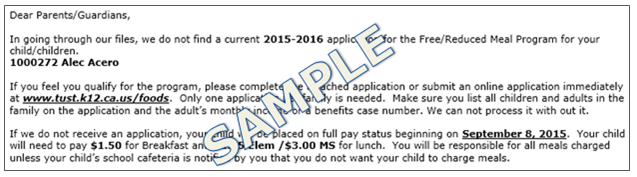
When Print is clicked, the Selected Document will be created using the filters configured in Report Options. A Recipient page is produced that shows the number of recipients. Selected records can be printed by using Create Document to make a PDF preview of the letter. The Printer icon prints a copy of the recipient page.
When Email is clicked, the user has an opportunity to select the recipients through the use of check boxes. See the illustration below. A check in the Relation header selects only the top listed (Sequence ID #1) contact shown in Student Profile or Editor. Top listed Contacts are marked with * in the Relation column.
Copies of emails can be sent to the logged in user by checking the CC to Self box with a choice of One Copy per Recipient or One Copy Only (per Household).
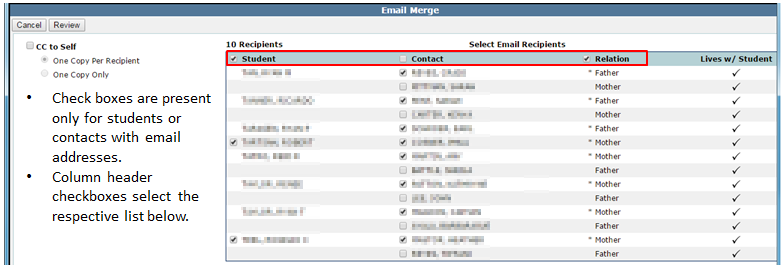
After making the recipient selections, click Review.
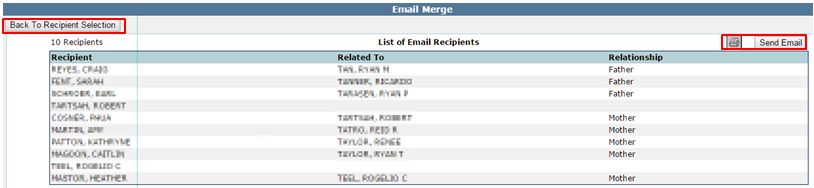
After reviewing the recipients, click Send Email or Back to Recipient Selection to make changes. Click the Printer icon to print a copy of the recipient list.
To build a mail merge document click Add New…
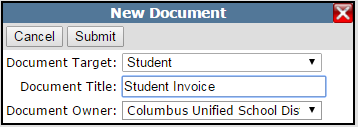
- Select a Document Target
- Student
- Staff
- Patron
- Create a Document Title
- Choose the document owner from the Track dropdown list
At the top of the document editor are choices for:
- Message Format - determines whether a document or email will be created
- Insert Data – determines which data fields will be merged into the document
- Comm Setup – allows a connection to Communications Tracking

To compose the mail merge document select each desired merge field from the dropdown list and click Insert Data to place it at the correct location in the letter.
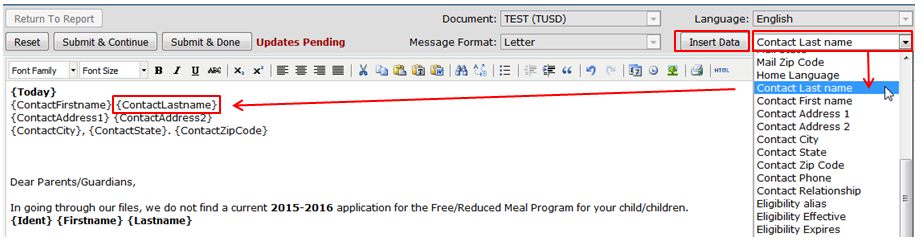
After composing the document click either Submit & Continue or Submit & Done or Reset to start over. Once a document has been created, it is easy to configure an email version.
- Copy all the text from your original document
- Change the Message Format to Email. This will open a blank document.
- Fill in the Email Subject and paste the contents from the original document.
- Click Submit & Continue or Submit & Done.

To setup Communications Tracking, click on Comm Setup and select Communication Type, Sender and Recipient. These selections are set up in the Communication Tracking Application in Front Office. Communications Tracking does not need to be set up to create and use Mail Merge, only if Tracking is desired.