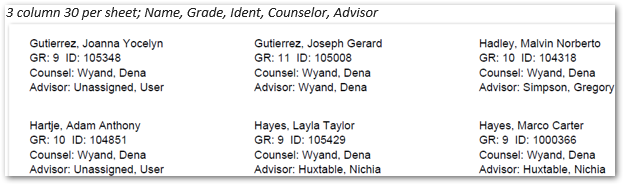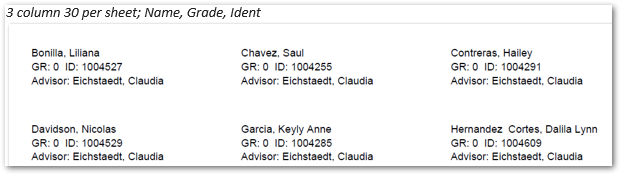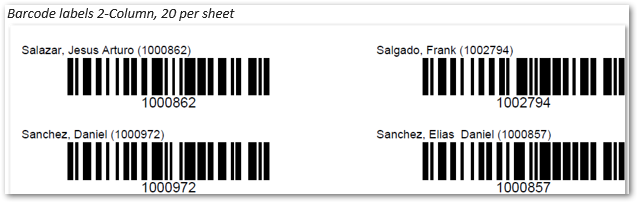
The Data Labels Report may be configured to print 3 different labels in a variety of formats including a barcode label and various student information labels
While details specific to this report will follow, users can find general information about reports within the Reports documentation.
Data Labels is located within Reports in the Enrollment menu in Q.
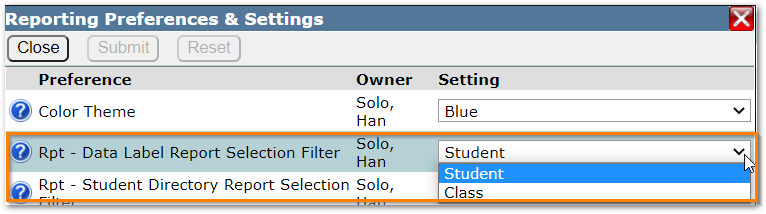
The Data Labels report gives users the option to set a preference to use either the Student or Class report selection filter. The preference may be set by clicking the cog located on the bottom left of the screen. When the Class filter is selected you may run the report for a specific teacher and class, however, when the Class filter is used only those students who have schedules will be reported. Use the Student filter to include all enrolled students.
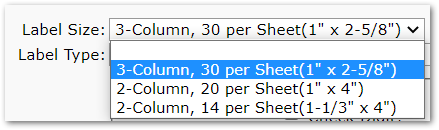
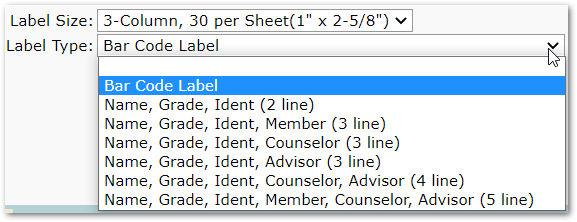
The Data Labels Report lets users choose from 3 different label sizes and 7 different label types including a Bar Code Label and 6 variations of Student Name, Grade and ID.
To run the report:
- Select desired Label Size
- Select Label Type
- Bar Code Label– When the Bar Code Label Type is selected, choose from the drop down list the bar code type compatible with your reader.
- The default Bar Code Type is Code 39. This is one of the oldest barcodes. Code 128 auto has become one of the most popular barcodes, widely used in applications where a relatively large amount of data must be encoded in a relatively small amount of space. For the most part, it tends to replace Code 39.
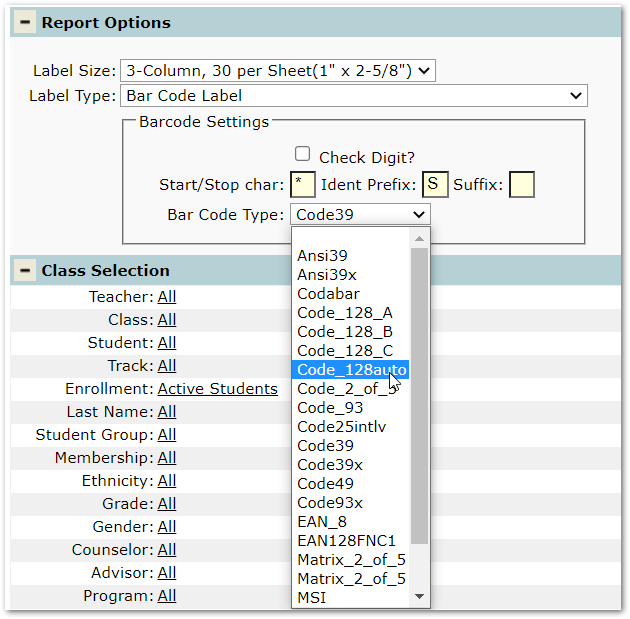
- After selecting a Bar Code Type compatible with what will be used to read the barcode you may populate the following additional fields as needed.
- Check Digit—is an extra character added to the barcode that is a simple hash of the other characters and is used to verify by the software that it has correctly read the barcode. It is up to the user to know if the software that will read the barcodes need or can use these extra bars.
- Start/Stop char—some programs might require the Start/Stop character. It is used by the reading device to know where the bar code begins and when it ends. The default Start/Stop character for a bar code is an asterisk (*) This may be changed if your bar code reader is programmed differently.
- Ident Prefix – the default prefix character is “S”. This can be edited. Up to three characters are allowed.
- Suffix – The default value is blank. This is a user-defined field. Up to three characters are allowed.
- Name labels
- Select one of six available text only formats (with no bar codes). All begin with student Lastname, Firstname on the first line. The fields are populated from student demographic information as entered in the Student Editor.