The Q Auto Tracker is a school specific app, used to enter and maintain parking permit information for students and staff.
Auto Tracker is located under the School menu in Q.
Q Auto Tracker is organized into 3 tabs: Staff, Students, and Setup. The Staff and Students tabs are used to enter new permits and maintain existing permit information. The Setup tab is used to define what information can be selected in the Staff and Student tabs. This includes: Auto Makes, Parking lot location, Payment types, and additional preferences.
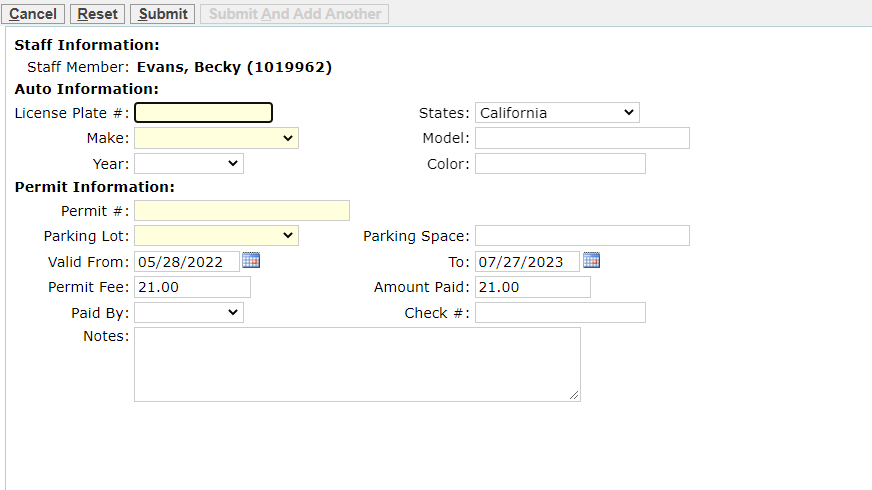
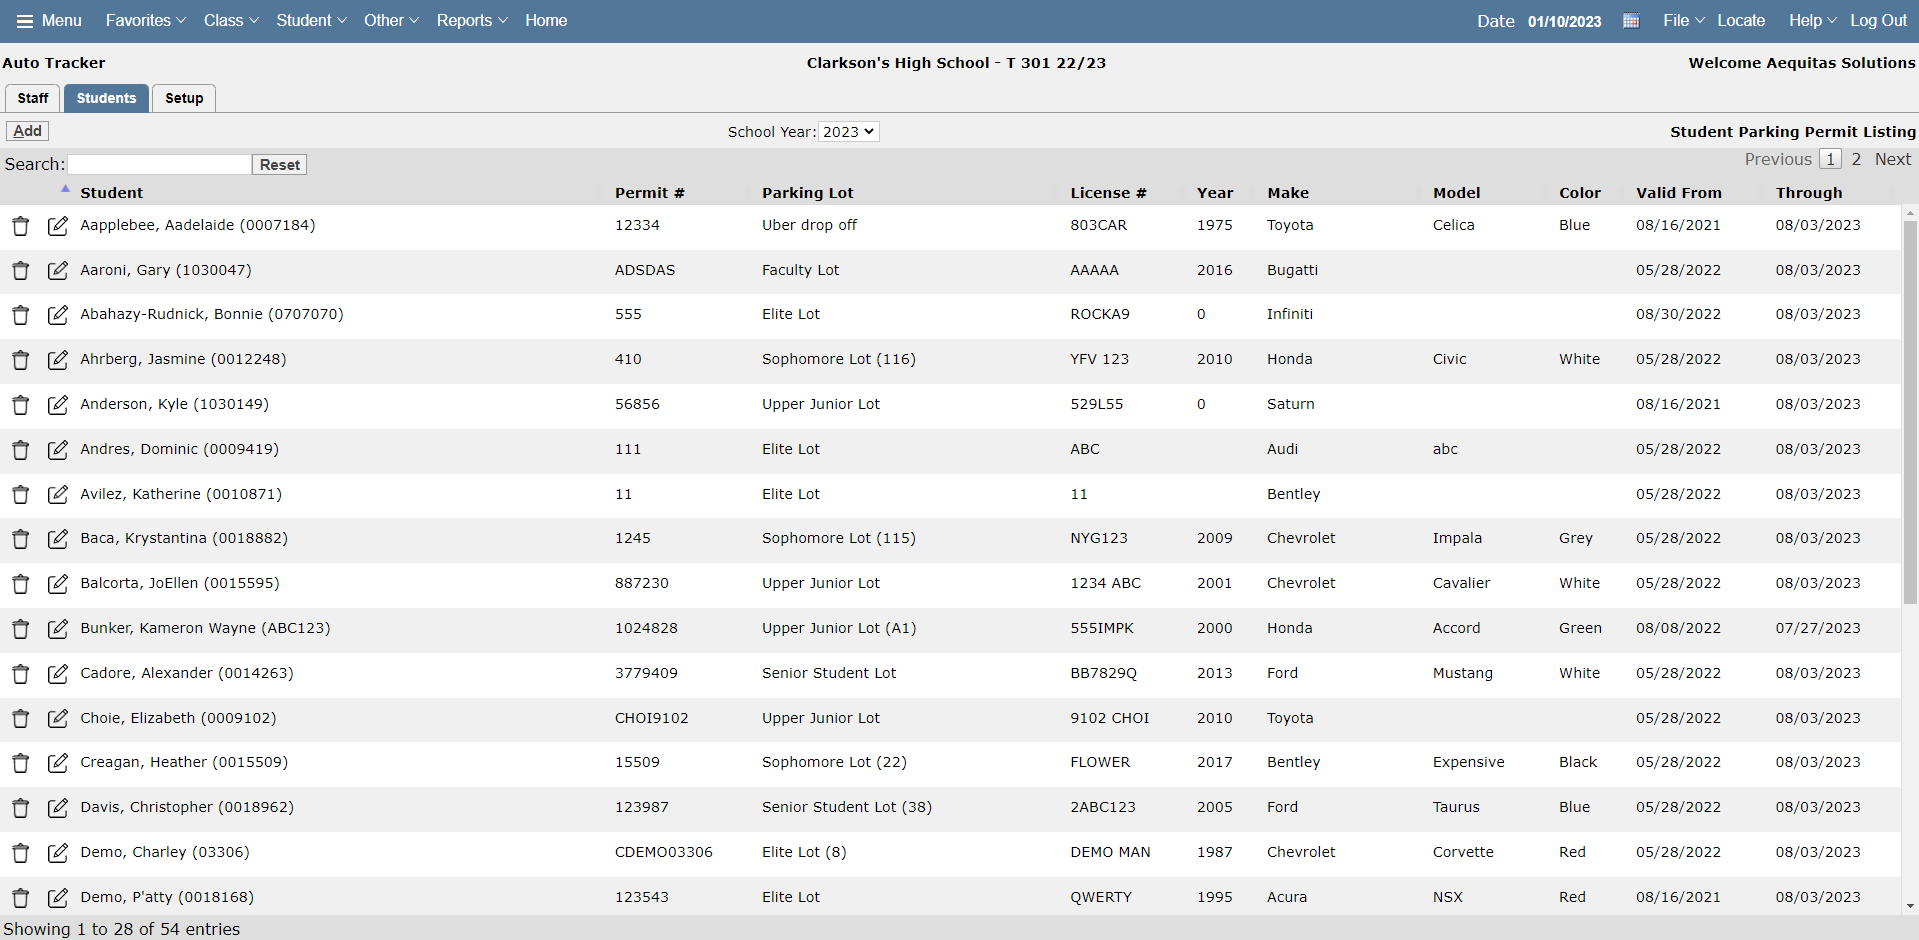
The Staff Tab is used to enter new permit information, and maintain existing permit information for Staff members. The default view is the maintenance screen, where you can view and search for staff permits for the current or previous school years. 
To add a new staff permit:
- Click
- Find the staff member searching with their name or id.

- Enter information. The required fields are yellow.
- Auto Information: License Plate #
- Auto Information: Make
- Permit Information: Permit #
- Permit Information: Parking Lot
- The remaining fields are not required, but may contain valuable information that you wish to save for each permit issued, such as the dates the permit is valid for, and the model and color of the automobile.
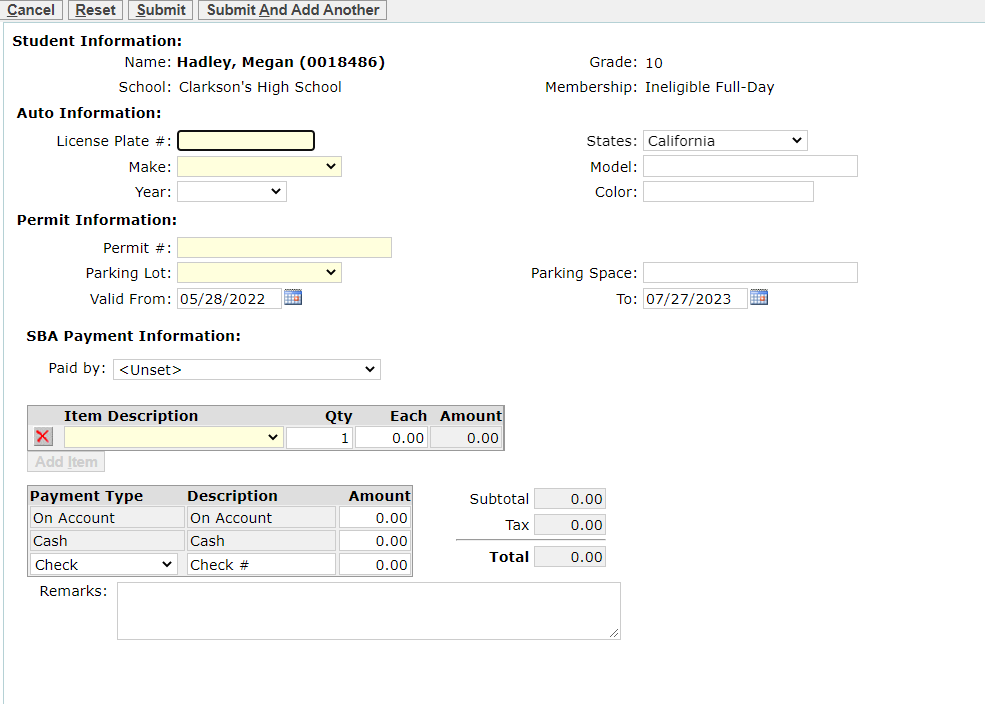
The Students tab has the same layout as the Staff Tab, but with Student Permit information. You may view, search, enter new, and maintain student permit information from this tab.
To add a new student permit:
- Click
- Find the student searching with their name or id.
- Enter information. The required fields are yellow.
- Auto Information: License Plate #
- Auto Information: Make
- Permit Information: Permit #
- Permit Information: Parking Lot
- The remaining fields are not required, but may contain valuable information that you wish to save for each permit issued, such as the dates the permit is valid for, and the model and color of the automobile.
*To enter permit information for multiple students, click Submit And Add Another to return to the Find screen to easily add additional students.
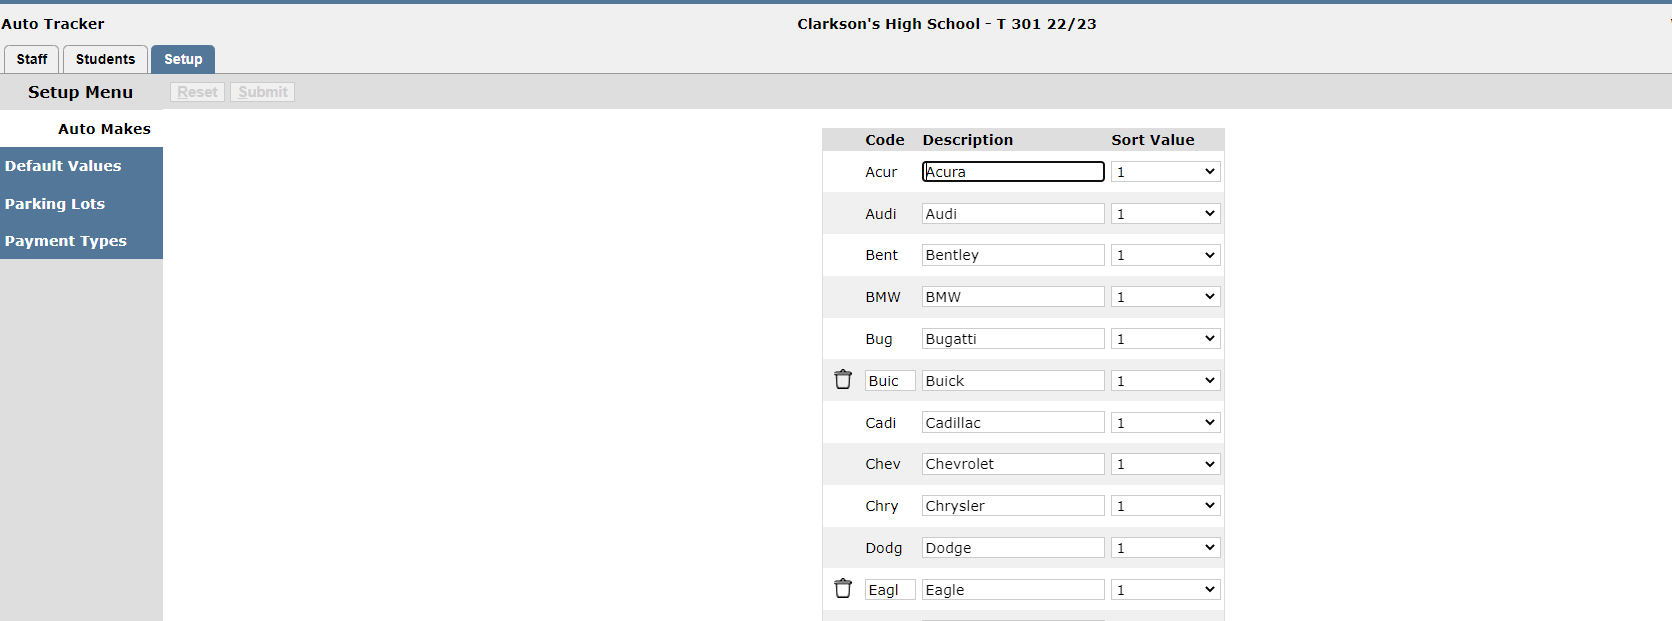
The Setup tab is composed of 4 sections that control what information will be available in the drop down tabs when entering/editing permit information, the Default Fees, and if multiple cars are allowed for the same permit.
Auto Makes:
The Auto Makes section is a custom table where the auto makes available in the drop down list are defined.
The Auto Make table contains the Auto Make Code, Description, and Sort Value. To add a new entry, click the Add Auto Make button at the bottom of the table and enter:
- Code—the code is used to tie records to the permit, and can only be edited if there are no permits using that code.
- Description—the description is what will display in the dropdown list when you add or edit a record.
- Sort Value—the sort value determines what order it will display in the dropdown list.
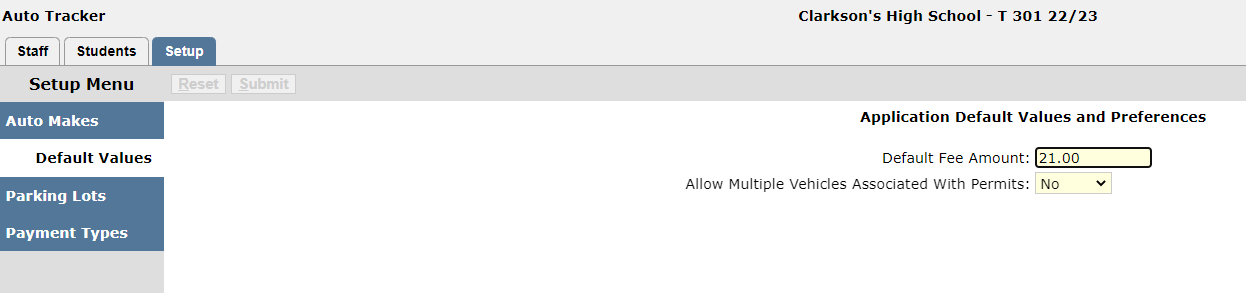
Default Values:
The Default Values section controls the Default Fee Amount for the permit, and a preference to allow multiple vehicles for the same permit. .
- The Default Fee Amount is what will be auto-filled in the Add/Edit permit screen, in the Permit Fee and Amount Paid fields
- The preference to allow multiple vehicles associated with permits is a Yes/No flag. If set to Yes, you may use the same permit number on multiple records. If set to No, you will not be able to save a record if an existing permit has the same permit number.
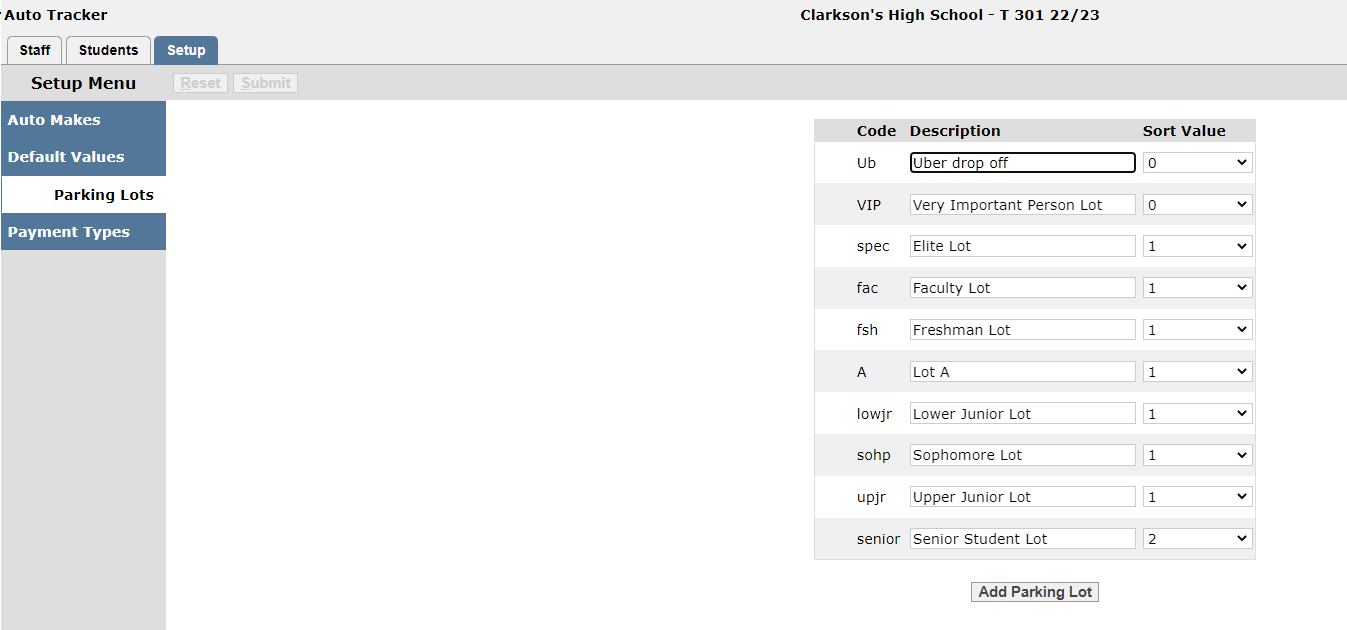
Parking Lots:
The Parking Lots tab is used to define parking lots available in the drop down list when adding or editing a permit record.
The Parking Lot table contains the Parking Lot Code, Description, and Sort Value. To add a new entry, click the Add Parking Lot button at the bottom of the table and enter:
- Code—the code is used to tie records to the permit, and can only be edited if there are no permits using that code.
- Description—the description is what will display in the dropdown list when you add or edit a record.
- Sort Value—the sort value determines the order the parking lot will display in the list.
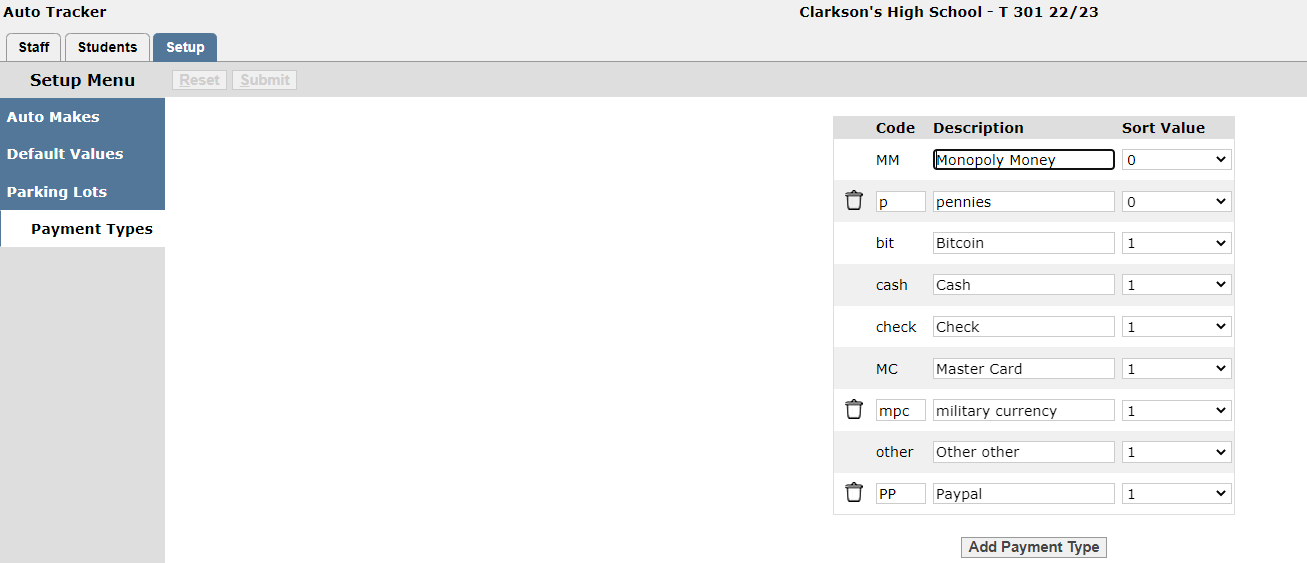
Payment Types:
The Payment Types tab is used to manage the types of payments in the Paid By drop down in the Add/Edit permit screen.
The Payment Types table contains the Payment Type Code, Description, and Sort Value. To add a new entry, click the Add Payment Type button at the bottom of the table and enter:
- Code—the code is used to define payment type.
- Description—the description is what will display in the dropdown list when you add or edit a record.
- Sort Value—the sort value determines the order the parking lot will display in the list. When a sort value of 0 is used the records will sort alphabetically.
- Sort Value—the sort value determines the order the parking lot will display in the list. When a sort value of 0 is used the records will sort alphabetically.
