Within Q, the applications and options available will depend on the permissions assigned to them. Once the user completes the login process, Q opens to the Home Page and provides access to the applications granted to the user through permissions.
Note
As a result of district configuration and the user’s permissions, the Home page may appear differently from the example shown, but the general guidance and information below will apply.
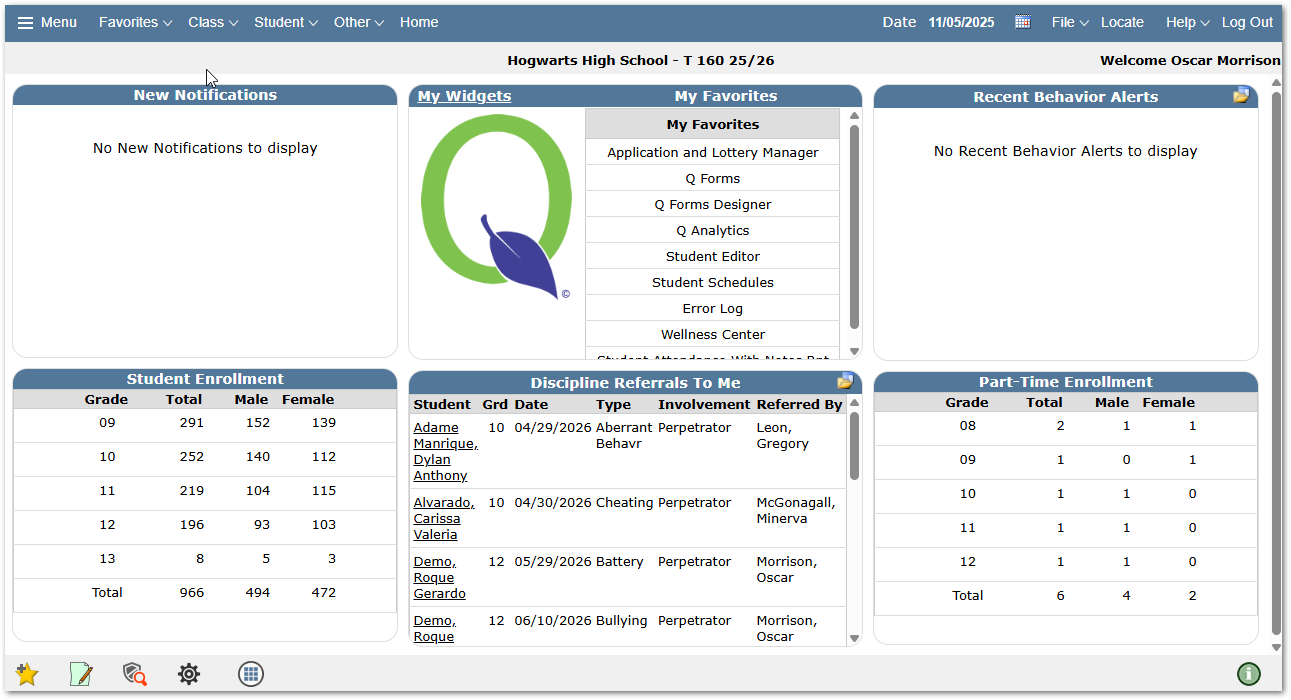
Home Page Guide

- Menu – Click ‘Menu’ or
 to view the menu
- Single click on any application to access it.
- Click Home within any application to return to the Home page.
- The Drop-down menus across the top enable selection of Class, Student, or Other applications. When in an application, Reports will also appear as a drop-down menu option with reports listed related to the current application.

- ‘My Favorites’ Widget – Displays applications and reports marked as favorites for the logged in user. Favorites are also available under the Favorites drop-down menu. See item #11 Favorites Icon or the Favorites Documentation to learn how to create a Favorite.
- Track - The logged-in track.
- Date – The System Date. Defaults to today’s date but can be changed by clicking the calendar icon.
- File – Users with access to multiple tracks may switch between their available tracks without having to log out of Q. Depending on your district’s settings, you may also be able to access ‘Change Password’ or access your staff ‘FS Account Balance’ or make a ‘FS Account Payment’.
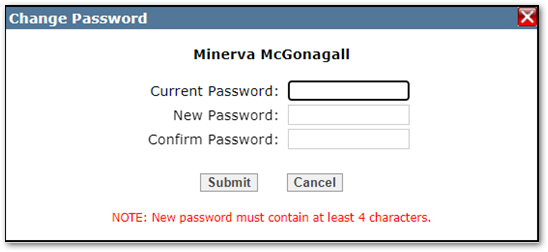
Users with Active Directory or LDAP log-in settings will not have password change functionality available.- Change Password
- To change your password, click File to open the file drop-down menu.
- Single click Change Password.
- Enter Current Password, New Password, and Confirm Password.
- Click Submit to save changes or Cancel to be returned to the previous screen.
- Edit Phone Info - Enable users to maintain their phone information. Click Add phone to add a new phone number
 Reorder Icon: Allows the user to drag-and-drop the phone number to reorder the sequence
 Delete Icon: Removes the phone number from the user’s record.
- Number: This 10-digit numerical field is for the user’s phone number.
- Ext: A numeric field for the phone number’s extension, if needed.
- Type: A dropdown menu where users can select the type of number.
- Unlisted: A checkbox allowing users to designate a phone number as unlisted
- Text Msg: Indicates that the associated phone number can receive text messages.
- Sequence: The number associated with the order phone numbers are displayed. Sequenced is changed by dragging the Reorder Icon.
- Switch School/Track - Users with access to multiple tracks can easily toggle between tracks without having to log out of Q.
- Click File to open the drop-down menu.
- Single click Switch School/Track.
- A list of available tracks will be displayed.

- For users with access to tracks from other years, a radio button will appear enabling selection of Current Year tracks, the default, or All Tracks. To include a prior or future year track in the selection list, select ‘All’.
- Single click the track the desired track.
- Click Select.
- The screen will refresh, and users will now be logged in to whichever track they’ve selected.
- Switch User- For support purposes, users with permission may impersonate other users.
- Click Switch User, select the desired user to impersonate, and click Select.
- To return to your view, click Switch User and click Be Myself at the bottom of the Switch User pop-up.
- Change Password
- Locate – Search for students.
Users with permission to Locate Students will see this function in the top right corner. Use this function to search for students within the district
- For inactive students who became inactive in a prior year, with permissions, the user can click the green arrow to go directly to the student in the track they last exited.
- Status – I-Inactive; A: Active; N: Non-Student
- A printer icon in Locate Students appears based on permission, and when clicked, will print the student’s transcript.
- Help – Links to the QWiki Help site and the Knowledge Base.
- Log Out – Log out of Q
- Current User – The current logged-in user displays.
- Home Page Widgets – Displays relevant data for the logged-in user. More information is available in the Widgets Documentation.
 - Favorites: Changes the order or removes favorite apps and reports. Use this in any other app or report to set that as a favorite. More information is available in the Favorites Documentation.
 - Sticky Note: Add personal notes for each app. More information is available in the Sticky Note Documentation.
 - Application Access History: Open application access history to view a list of when Q was last accessed, as well as which applications were accessed and the time which they were opened.
  - Preference Cog: Shows available user Preferences. The preferences available for users from the Main View are Color Theme, Student Search Focus, Report Selection Filters, Separate Alert Types, Number of Days an Alert is 'new', and Open Same Application after Switching Tracks.
 - Widget Subscriptions & Configuration: Opens a list of available widgets and configuration placement options. More information is available in the Home Page Widgets Documentation.
 - Notification Icon: Displays recent Notifications. The icon will be red if there are new, unread notifications.
Videos
Quick Reference Guide
