The Student Profile application displays demographic information for students. The application provides staff members with the ability to customize the student demographic information they would like to view.
Student Profile is located under the Enrollment menu in Q.
The Student Profile application is highly customizable. In addition to being able to select what areas of student data they wish to view, users may also manage the display order of the selected data. This allows faculty to eliminate the student data they do not wish to view, as well as, arrange the profile areas to best meet their personal needs.
- Open the Student Profile application
- Click on the Configure Menu tab.
- Move the application viewing tabs up or down by clicking on them and dropping them in the desired viewing location.
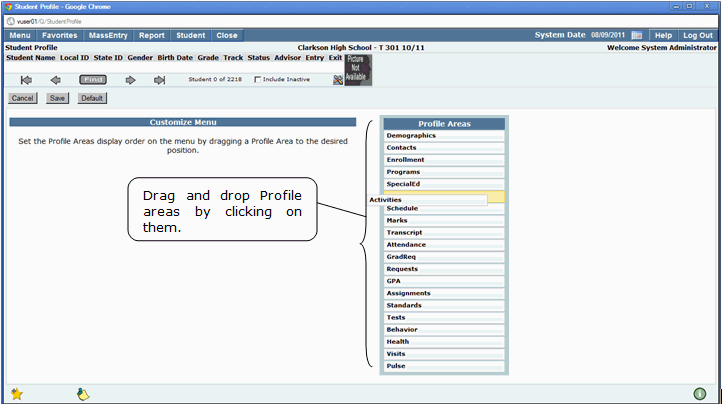
4. Once you have placed all profile areas in their desired areas, click Submit to save your changes.
5. If you would like to clear positioning of the profile areas, click Reset.
6. To cancel and clear all changes made since the last Submit, click Cancel.
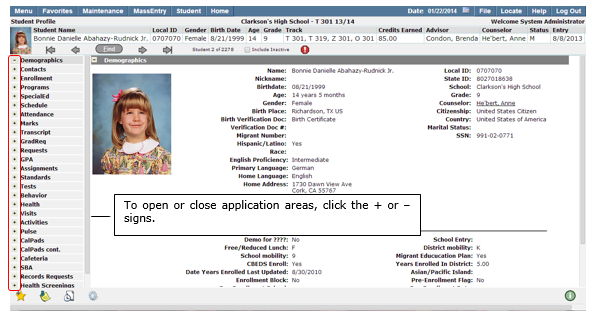
The Student Profile and Banner provide users with quick access to student demographic information. Items such as the student name, student IDs, gender, birthdate, track, grade, status, entry and exit dates may be configured to display in the student banner. Users can choose to add or remove various student demographic details by configuring the student banner.
Note: For additional information regarding the configuration and use of the Student Banner refer to the Student Banner help documentation.
Student Banner

Note: Only applications for which a user has been granted permission will appear in the Profile Areas selection list on the left.
- Select the profile application area for which you would like to view data.
- Once you have maximized a profile area it will remain open as you scroll through students. To close the profile area click the minus sign (–) next to the profile area on the left hand side of the screen.
- If no profile areas have been viewed for a student, all application areas will be minimized when the Student Profile application is first opened. To maximize application viewing areas, click the plus sign (+); to minimize areas once they have been maximized, click the minus sign (-).
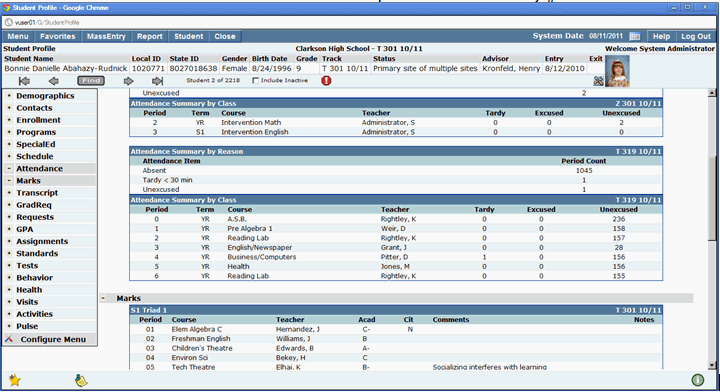
Multiple profile areas may be maximized at once allowing users to view multiple student information areas. For example, users may choose to view Student Schedule, Attendance and Marks by maximizing them. The screen will expand depending on the amount of applications open.
Student Profile Marks and Attendance areas open simultaneously
Optional: The Student Profile information may be printed for students. To print the application area information for students click on the printer icon located at the top of the profile area viewing screen.

