Many schools will gather students by class to administer Health Screenings. To ease recording of these screening results by class, we have the Class Health Screenings app.
The Class Health Screenings app is a class banner app that will show all students scheduled in a class and allow the user to record default or individual screening results for that class.
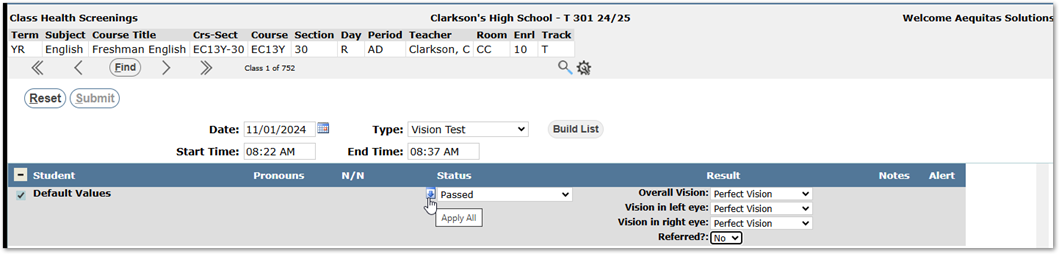
First navigate to the application found under the Health Menu. Once the application is open use the Class Banner to find the class that is being screened.
- Set Screening Date
- Set the Type of Screening (For this we will look at a Vision Screening)
- Click Build list to display the class roster

It is a good practice to set the Default Values at the top of the list to be the most common screening results. This will help filling out the majority of students status in the class.
The down arrow will apply the default to all students in the class that have not had any screening information entered. To apply the default to individual students you can click on the Right arrow found next to the Status dropdown.
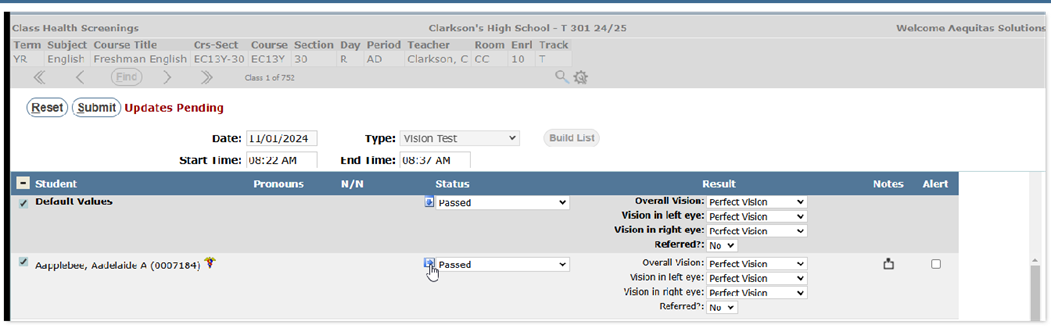
To record results per student you can use the dropdowns, add note if needed, and flag if this screening should be an alert in the Student Banner.
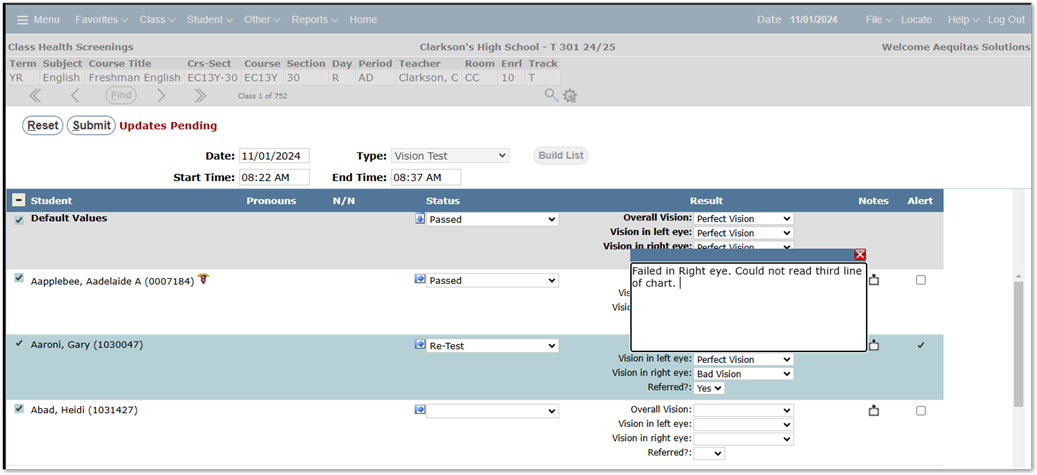
Uncheck students that are not present or were not screened so they will not receive the default results.