SBA Setup is used for the configuration and maintenance of the Q Student Body Accounting applications; SBA Accounts, Fees, and Transactions.
Before using the SBA setup application, it is important to check and/or populate two Lookup Code Categories:
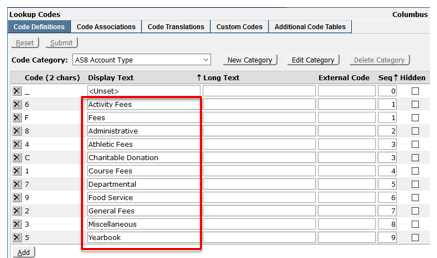
- ASB Account Types – Account types are used to organize School Accounts into groups for reporting purposes and can be aligned with your district’s Accounting Department.
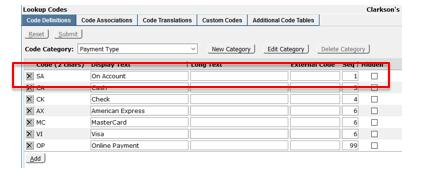
- Payment Types - Payment type codes are used to designate the method used to pay for an SBA transaction. The Payment Type Code SA, On Account is required. The system uses this code when 'Charge to Account' transactions are processed.
Preferences are managed using database settings in the SNPREF table as well as using the Preference Editor.
- Account Number Mask - The Account Number mask, PREFVAL in snpref, is used by Student Body Accounting to control the format of the account number.
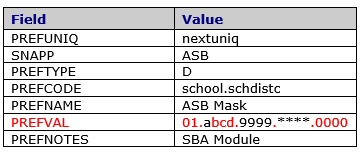
Q SBA can accommodate up to 36 characters in the account number (counting periods). These can be alpha, numeric or both according to the following key:
‘9’ - is a placeholder to fill in numeric characters (0-9)
‘a’ - is a placeholder for alpha characters (A-Z, a-z)
‘*’ - is a placeholder for either (A-Z, a-z, 0-9)
In the above PREFVAL example, the characters in black would be entered by the user and the other characters represent fixed values.
In the example below, as soon as the user clicks the account number field, it pre-populates with the mask and the user only enters values where the mask has variables.


This makes it fast and easy to set up the Accounts.
- Transaction Preferences- Items can be purchased in two applications, SBA Accounts and SBA Transactions, and each has its own set of preferences in the Q Preference Editor. The choices are the same for both applications.

- Default Payment - This preference is used to control the default payment type (Cash or On Account) when a transaction is recorded.
- Limit Transactions to Single Items
YES - Permit one line item only per transaction.
NO - Permit multiple items per transaction. - Allow Price Changes
YES - Permit a price change for all items when processing a transaction.
NO – Don’t permit a price change on a transaction (unless price is set to zero).
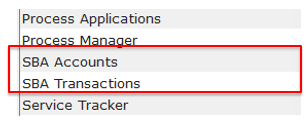
Student Body Accounting Setup is under the SBA Menu.
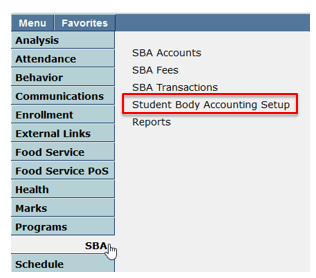
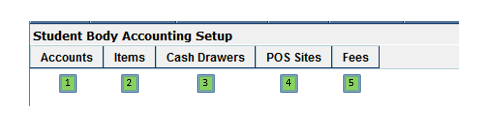
Follow the tab order for the most efficient setup as the configurations build upon each other.
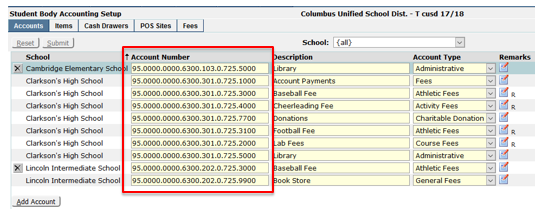
Click Add Account.
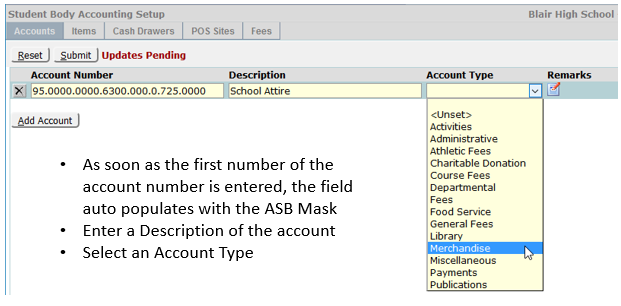
Click Submit
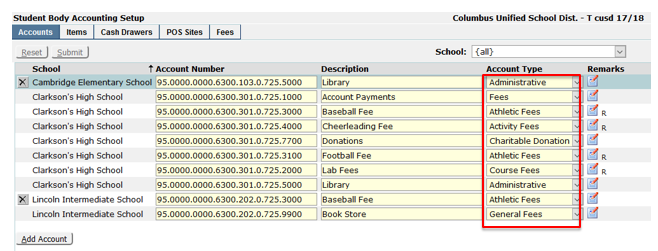
Click on the note icon to enter Remarks about the account. Accounts with existing Remarks with show “R”

The Account Description will become a drop-down menu item when configuring SBA Items.
The Items menu is wide and has Description and Price and Quantity and Availability sections.
The Items menu is wide and has Description and Price and Quantity and Availability sections.
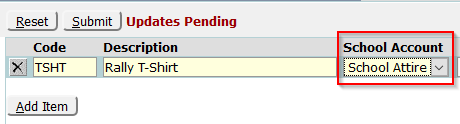
Description and Price – Click Add Item, create an alphanumeric code (up to 10 characters), Item Description, and select a School Account.
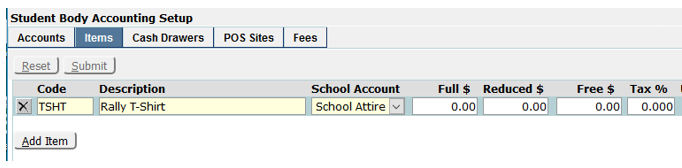
The price fields are designed to be able to follow the student’s Free/Reduced meal status (accessed in the database as fspayc in the fsstatus table) and tax can be assigned per item.
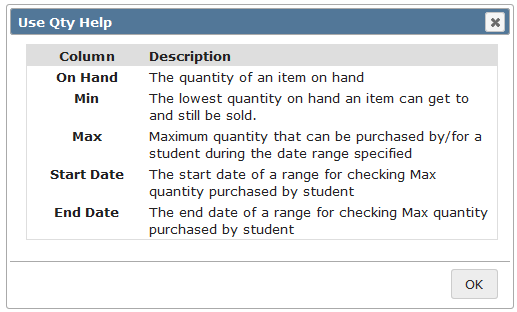
Quantity and Availability – When Use Qty is checked, other fields become available.

Click on the ? (Help) icon to see how to configure the Use Qty fields.
Cash Drawers - Cash Drawers are used to identify where transactions are recorded for reporting and reconciliation purposes.
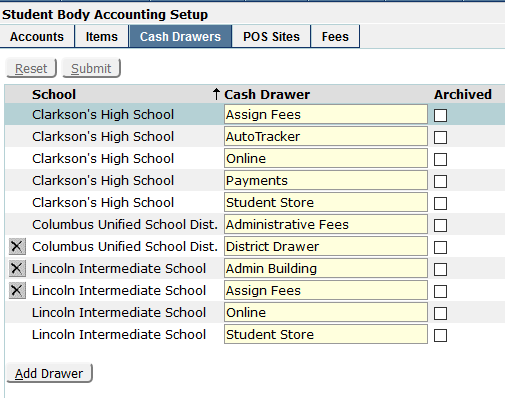
Click Add Drawer and enter the name of the drawer. When a drawer is Archived it is no longer active and available to be used. Only drawers with no transactions will show an X and can be deleted.
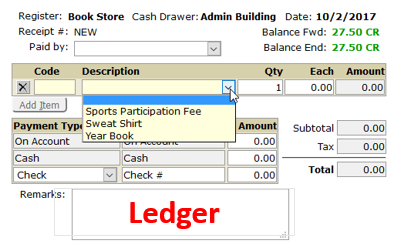
POS Sites is used to build the point of sale interface for use by cashiers using SBA Transactions. The interface uses two formats, Ledger and Register.
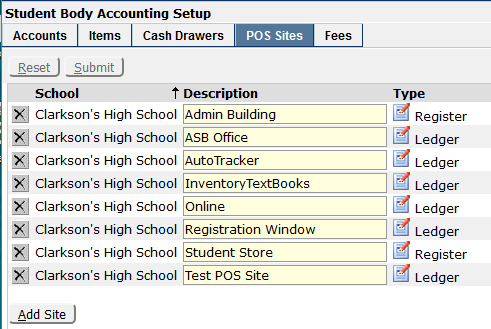
Click Add Site to add a POS Site. Enter a Description and choose either Ledger or Register.
Ledger – use the arrows to build the list of menu items that will be available from this Point of Sale site and click Submit.

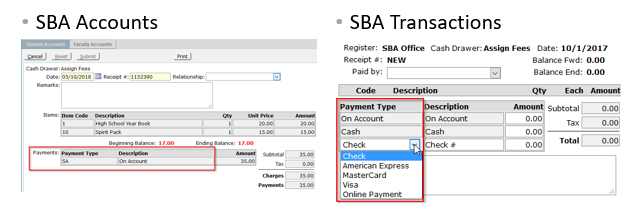
View of Ledger format in SBA Transactions. Items are selected from a drop-down menu.
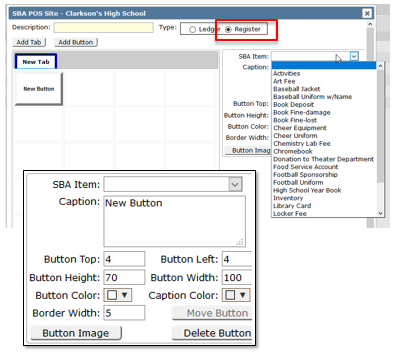
Register – click Add Button and with each new button select an SBA Item from the drop-down list. Buttons can be custom sized and colored and moved using the Button Top and Button Left controls or dragging and dropping them into place. Multiple tabs with color options can also be added and named. Buttons can also use images and are designed by default to be 70 pixels high by 100 pixels wide.
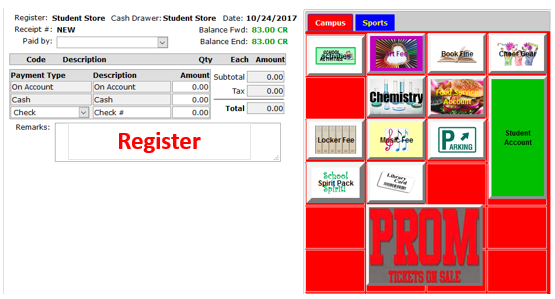
View of Register format in SBA Transactions. Items are selected clicking on the buttons.
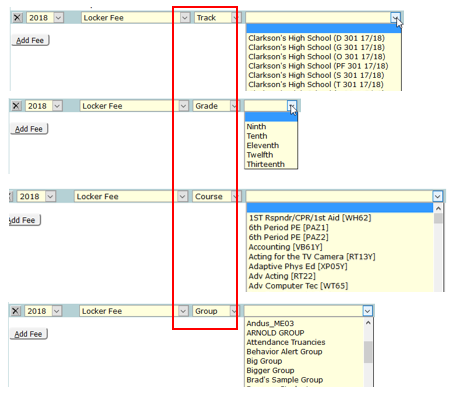
A Fee is used to associate a specific SBA Item with a target pool of students.
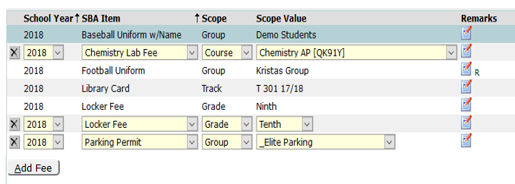
Click Add Fee and select the School Year and SBA Item. Fees can be assigned to Tracks, Grades, Courses or Groups and depending on which one is chosen, the drop-down menu changes so show the associated choices. See examples below.